If your first few batches of kefir taste thin, overly sour, or do almost nothing, the problem may not be your skill. It may be the condition of the grains you started with. The maintenance routine for dried kefir grains vs fresh grains is different, especially during the first week.
Quick answer: Fresh kefir grains are already hydrated and usually begin fermenting sooner. Dried kefir grains are more shelf-stable and easier to ship or store, but they need a rehydration and “wake-up” period before they behave like active grains. Neither option is automatically better for everyone; the best choice depends on how soon you want to ferment, how carefully you can maintain them, and whether you need storage flexibility.
Why does the choice between dried and fresh kefir grains matter?
Kefir grains are living fermentation cultures. They contain communities of bacteria and yeasts held together in a soft grain-like structure. When they are healthy and properly fed, they transform milk or sugar water into a tangy fermented drink.
The reason dried kefir grains vs fresh grains matters is simple: their starting condition affects your first batches.
- Fresh grains usually adjust faster because they are already moist and metabolically active.
- Dried grains are dormant and must absorb liquid again before strong fermentation begins.
- Newly shipped grains may be stressed by temperature changes, time in transit, or lack of fresh food.
- Your first batches may not taste ideal while the grains rebalance.
This is normal. A slow first batch does not always mean the grains are dead. For more signs of life, see Is my kefir grains dead?.
What are fresh kefir grains?
Fresh kefir grains are active grains that are kept moist in their fermentation liquid or a small amount of fresh medium. For milk kefir, that usually means milk. For water kefir, that usually means sugar water.
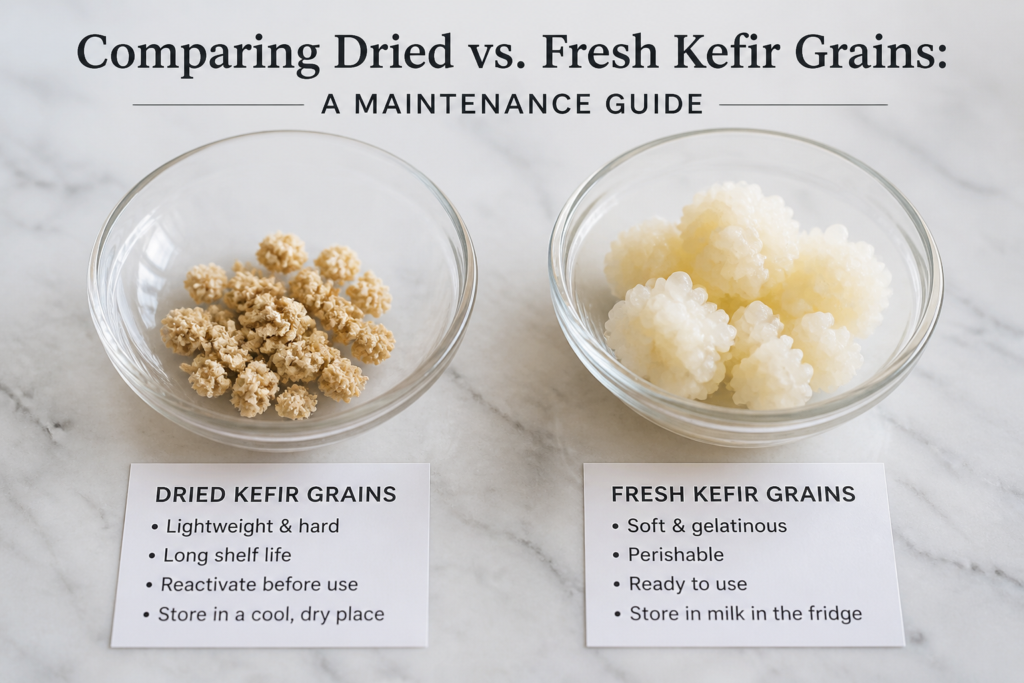
They often look plump, soft, and irregular. Milk kefir grains may look like small cauliflower pieces. Water kefir grains are usually more translucent and crystal-like. Size and shape can vary a lot, so appearance alone is not the only way to judge health. If you want a visual guide, read Kefir grains 101-size, shape and color.
Fresh grains are useful when you want faster results
Fresh grains are usually the easier option for beginners who want to start fermenting soon. They still may need one or two adjustment batches after shipping, but they normally do not need a long rehydration stage.
- Best for: beginners who want active fermentation sooner.
- Main advantage: faster recovery and easier observation.
- Main risk: they need care quickly after arrival and should not be left unfed for too long.
What are dried kefir grains?
Dried kefir grains are grains that have been dehydrated to slow their activity. They are not the same as single-use kefir starter powder. True kefir grains can usually be reused once they are fully reactivated, while starter powders are often used for a limited number of batches.
Dried grains are convenient for storage, travel, gifting, or delayed use. But they need patience. During reactivation, they are waking up, rebuilding their balance, and adapting to fresh food again.
Dried grains are useful when flexibility matters
If you cannot start fermenting immediately, dried grains may be practical. They are also less messy to transport. The trade-off is that the first several batches may be weak, sweet, yeasty, flat, or inconsistent.
- Best for: storage, travel, backup cultures, or delayed use.
- Main advantage: convenient and more tolerant of short-term handling delays.
- Main risk: reactivation takes time and requires repeated feeding.
How do dried and fresh kefir grains compare in daily maintenance?
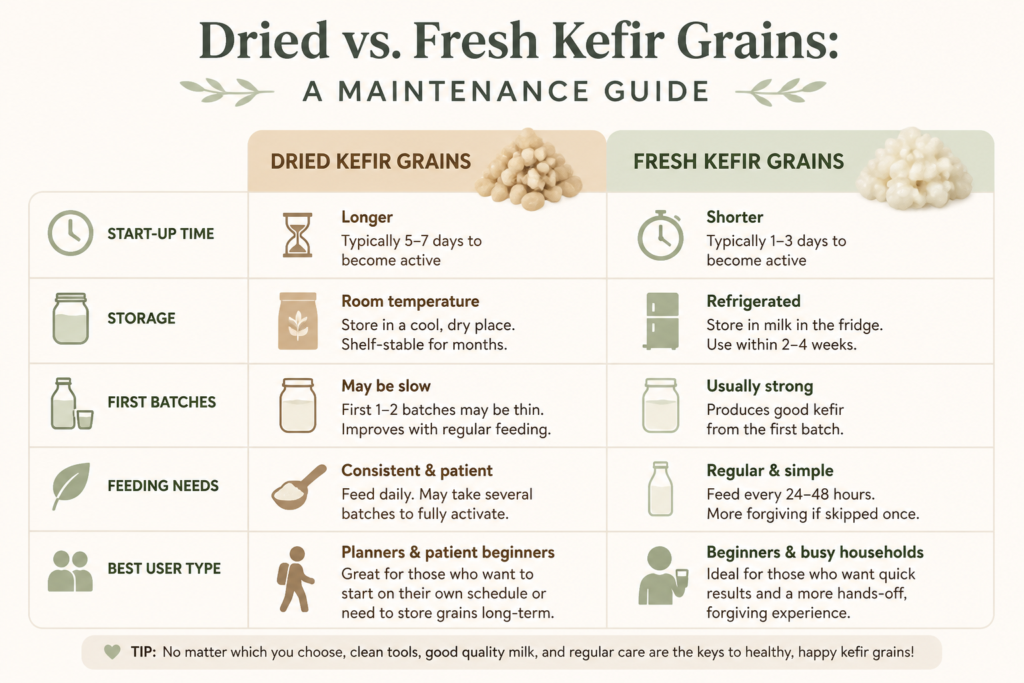
- Start-up time: Fresh grains may begin fermenting within the first few batches. Dried grains usually need several refreshes before producing good flavor and texture.
- Beginner friendliness: Fresh grains are easier if you want to learn by observing normal fermentation. Dried grains require more patience.
- Storage: Dried grains are easier to keep as a backup. Fresh grains need regular feeding or refrigeration if you pause.
- Flavor consistency: Fresh grains usually become consistent sooner. Dried grains may create unusual early flavors while recovering.
- Best use: Fresh grains are best for immediate fermentation. Dried grains are best for backup or delayed use.
How should you start fresh milk kefir grains?
Use this gentle routine when fresh milk kefir grains arrive or when they have been resting in the refrigerator.
- 1. Place the grains in a clean glass jar. Use clean utensils and avoid strong soap residue.
- 2. Add fresh milk. Start with a modest amount rather than a huge jar. Too much milk can dilute early activity.
- 3. Cover the jar. Use a breathable cover for room-temperature fermentation or a loose lid depending on your normal method.
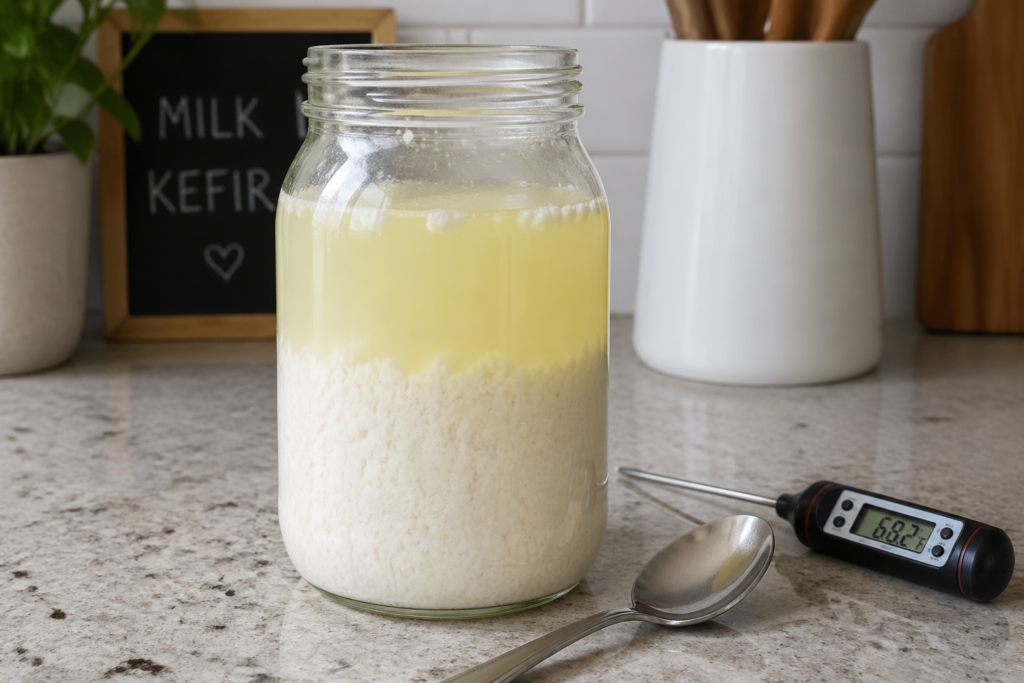
- 4. Ferment at room temperature. Watch for thickening, tangy aroma, slight separation, or bubbles.
- 5. Strain and repeat. If the first batch smells normal but tastes weak, discard or use it only if you are confident it fermented properly. Feed the grains fresh milk again.
- 6. Expect improvement over several batches. After shipping or cold storage, grains may need time to return to full strength.
If you need ready-to-use grains, see Kefir Grains.
How should you reactivate dried milk kefir grains?
Dried grains need a slower, more patient routine. Do not judge them by the first jar.
- 1. Rinse only if your supplier instructs you to. Unnecessary rinsing may slow recovery.
- 2. Place dried grains in a small amount of milk. Use enough milk to cover and feed them, but not so much that activity is hard to detect.
- 3. Change the milk regularly. Refresh the milk every 24 hours, or sooner if it separates strongly or smells unpleasantly over-fermented.
- 4. Do not drink the first recovery batches if they seem unbalanced. Early batches may taste stale, bitter, overly yeasty, or simply not fermented enough.
- 5. Continue until signs become steady. Look for a clean tangy smell, gentle thickening, and predictable fermentation timing.
- 6. Increase the milk gradually. Once the grains are active, give them more milk as they become stronger.
The goal is not to force fast fermentation. The goal is to let the grains rebuild a stable rhythm.
How should you maintain water kefir grains?
Water kefir grains follow the same broad idea: fresh grains tend to begin faster, dried grains need rehydration. But the feeding liquid is different. Water kefir grains need sugar water, not milk.
- 1. Use clean water. Avoid heavily chlorinated water if possible, because it may slow fermentation.
- 2. Add sugar. Water kefir grains need sugar as their main food source.
- 3. Add grains and ferment. Look for light bubbles, a mildly tangy aroma, and reduced sweetness.
- 4. Refresh regularly. Weak or newly reactivated grains may need several cycles before the drink tastes balanced.
- 5. Keep milk and water kefir grains separate. They are not the same culture and should not be used interchangeably without guidance.
What mistakes should you avoid with dried and fresh grains?
Mistake 1: Expecting dried grains to work like fresh grains on day one
Dried grains are dormant. If they do not thicken milk or bubble strongly right away, that does not automatically mean failure. Keep feeding them and watch for gradual improvement.
Mistake 2: Starving fresh grains after they arrive
Fresh grains need food. If they arrive alive and moist, do not leave them sitting for days at room temperature without fresh milk or sugar water. If you cannot start right away, use a short pause method and keep them cold. For a step-by-step storage guide, see How to stop kefir fermentation and put the grains on pause?.
Mistake 3: Using too much liquid too soon
Weak or newly reactivated grains can be overwhelmed by too much milk or sugar water. Start small. Increase the amount only when fermentation becomes reliable.
Mistake 4: Sealing an active fermentation too tightly
Kefir fermentation can produce gas. If you seal an active jar tightly, pressure may build. Use a method appropriate for your recipe and open carbonated drinks carefully.
Mistake 5: Confusing normal separation with spoilage
Milk kefir may separate into curds and whey when it ferments longer or warmer than expected. This can be normal, especially when grains are active. However, separation plus foul odor, fuzzy mold, or unusual discoloration is not something to ignore.
When should you discard kefir grains or a batch?
Fermentation involves judgment. When in doubt, especially if you are new, choose safety over saving one batch.
- Discard the batch if you see fuzzy mold. Mold may appear green, blue, black, pink, or fuzzy white.
- Discard if the smell is rotten, putrid, or sharply unpleasant. Normal kefir smells tangy, sour, yeasty, or mildly dairy-like. It should not smell like decay.
- Discard if there is unusual bright discoloration. Slight color variation can happen, but strong pink, orange, or dark patches are warning signs.
- Discard if the grains feel slimy in an unusual way and do not recover after several clean feedings.
- Do not taste a batch to “check” if it looks unsafe. Visual mold or rotten odor is enough reason to throw it away.
If the grains only look smaller, larger, softer, or temporarily inactive, they may still be alive. Compare with the signs in Is my kefir grains dead? before giving up too quickly.
How can you put active grains on pause?
If you need a break, refrigeration is usually the simplest short-term pause method for active milk kefir grains. Strain the grains, place them in a clean jar, add enough fresh milk to cover them, and refrigerate. Check them regularly and refresh the milk if it becomes very separated or depleted.
After a pause, do not expect the first batch to be perfect. The grains may need a few feeding cycles to wake up again. This is especially true if they were stored cold for more than a few days.
Which should you choose: dried or fresh kefir grains?
- Choose fresh grains if: you want to start soon, you are a beginner, and you can feed them right away.
- Choose dried grains if: you need flexible storage, want a backup culture, or cannot begin fermenting immediately.
- Choose neither if: you want a completely hands-off product. Living grains need regular care.
For most beginners, fresh grains are easier because they show signs of fermentation sooner. For careful planners, dried grains are useful because they provide backup and flexibility.
Takeaway: treat the first week as an adjustment period
The most important maintenance rule is this: match your expectations to the condition of the grains. Fresh grains need prompt feeding. Dried grains need patient reactivation. Both can become reliable when they are fed regularly, kept clean, and protected from extreme temperatures.
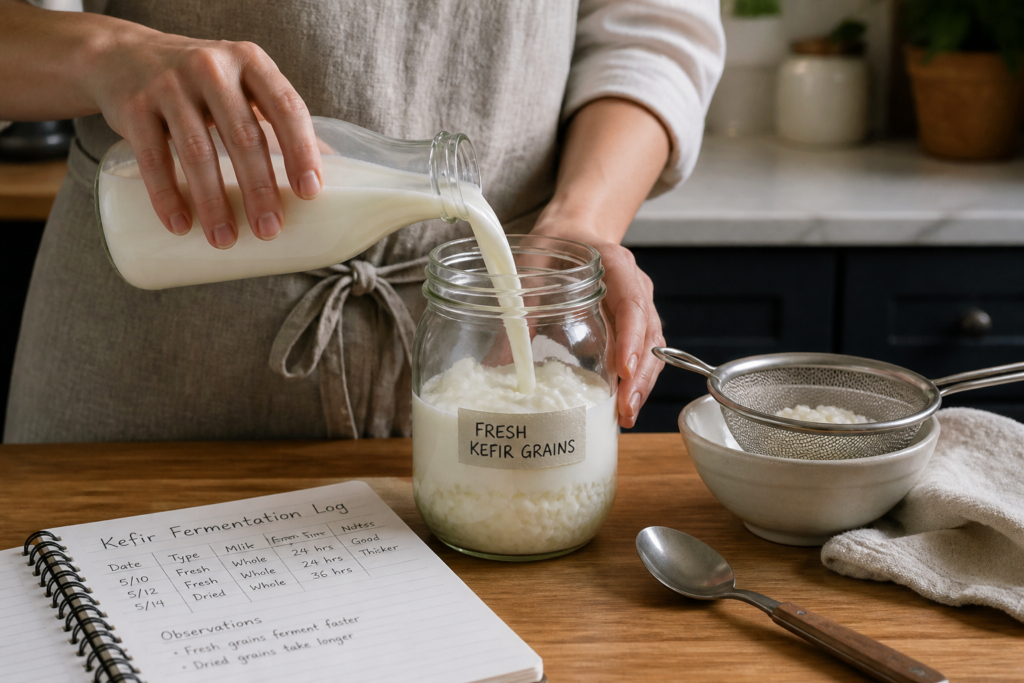
If your first few batches are not perfect, do not panic. Observe the smell, texture, timing, and visible changes. Keep notes for several cycles. Kefir is a living fermentation process, and rhythm matters more than one single batch.
Your next step: if you already have grains, decide whether they need feeding, pausing, or reactivation today. If you are still choosing, start with fresh kefir grains if you want the simplest learning path.